

Learning how to take a screenshot on your iPhone is one of those small tricks that makes a huge difference on you know how it's done. Imagine this, your sister FINALLY sends you the family-favourite secret lasagna recipe. The one you've been asking for for years. It only exists in that one text message, and you are not about to risk losing it in the scroll. A quick screenshot saves it as a picture instantly, tucked safely in your Photos app whenever you're ready to cook.
Maybe it's directions to your cousin's new place, a confirmation number for a doctor's appointment, or whatever you may need to capture quickly - a screenshot can handle all of it.
If you've never tried this, or you have and the buttons never seemed to cooperate, you're definitely not alone. Lots of folks either don't know this feature exists, or know it does and get stuck trying to do it. Don't worry, once you know exactly what to press and when, it takes about 3 seconds and it'll be a tip you'll keep using for a long time!
Here's exactly what to do.
How to Take a Screenshot on Your iPhone: The Quick Version
Newer iPhones (without a home button)
Press the Side Button and Volume Up Button at the same time, then, let go quickly.
Older iPhones (with a home button)
Press the Side (or top) Button and the Home Button together.
Either way, your screenshot saves itself in the Photos app by tapping the checkmark in the top right corner and tapping Save to Photos.
Which iPhone Do You Have?
There are two slightly different ways to take a screenshot, depending on your iPhone. Newer iPhones (most from 2018 onward) don't have a round button below the screen. Older iPhones do. Not sure which one you're holding?
This quick guide → Ole Dog New Tech - Which iPhone Model Do I Have? will help you figure it out in under a minute.
Once you know which one you have, jump to the section that suites your iPhone below.
For Newer iPhones (No Home Button, Most iPhones From 2018 and Newer)
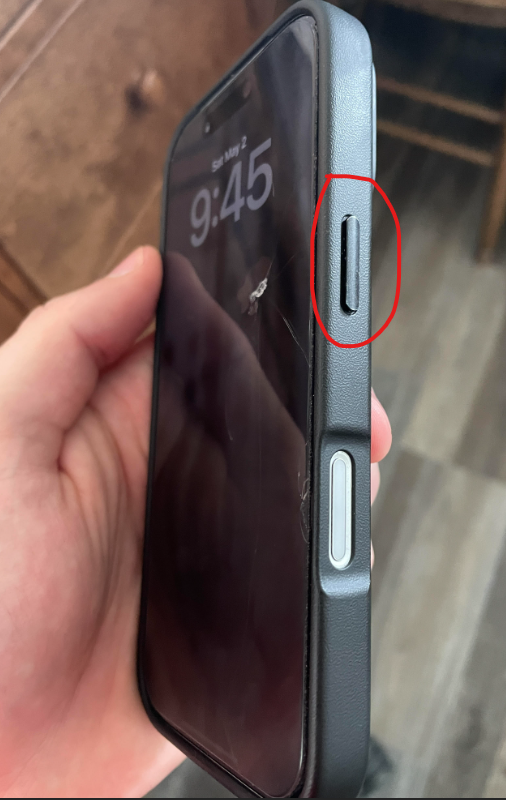
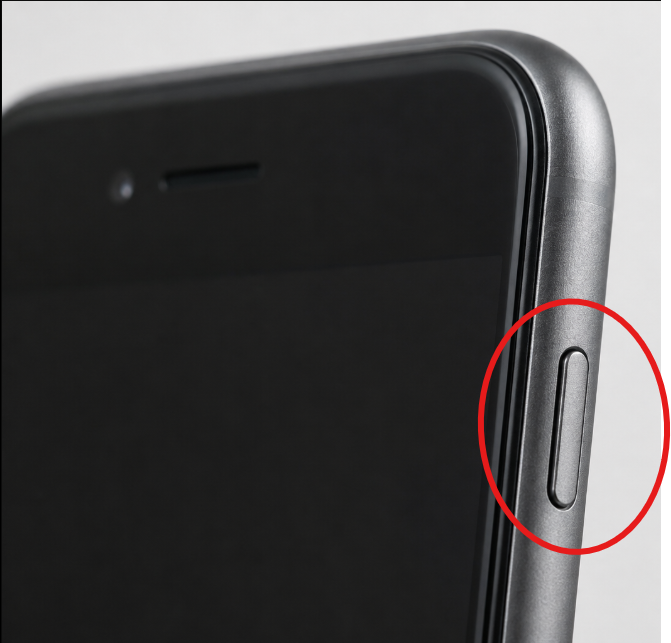
Step 1: Find the Side Button. It's on the right edge of your phone, the long button you use to lock the screen.
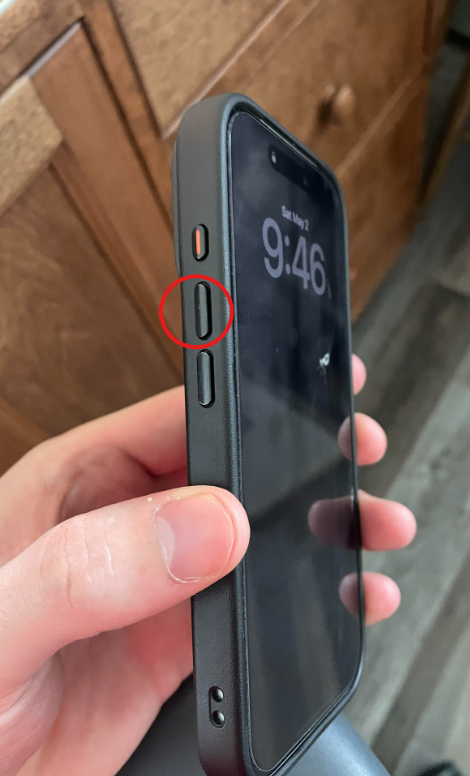
Step 2: Find the Volume Up button. It's on the left edge, the top button of the two volume buttons.
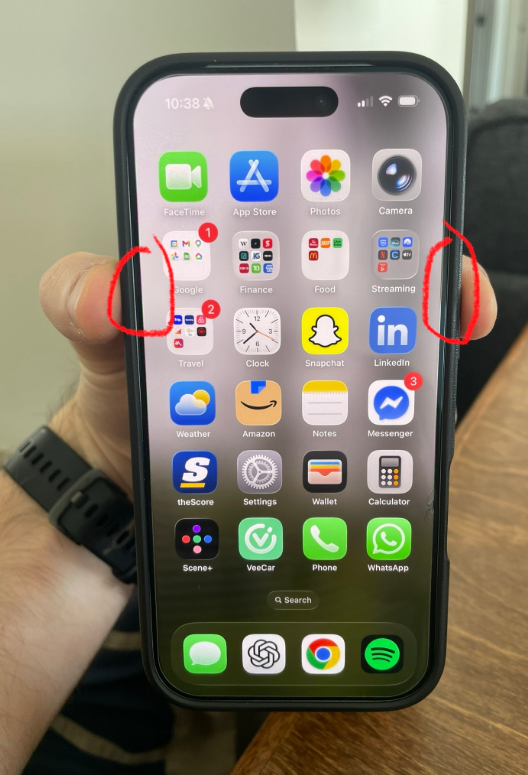
Step 3: Press both buttons at the exact same time.
Step 4: Release them quickly. You'll notice the screen flash white, like a quick camera snap, and you may even hear a shutter sound (it's normal if you don't, that likely just means your volume is low or on silent).
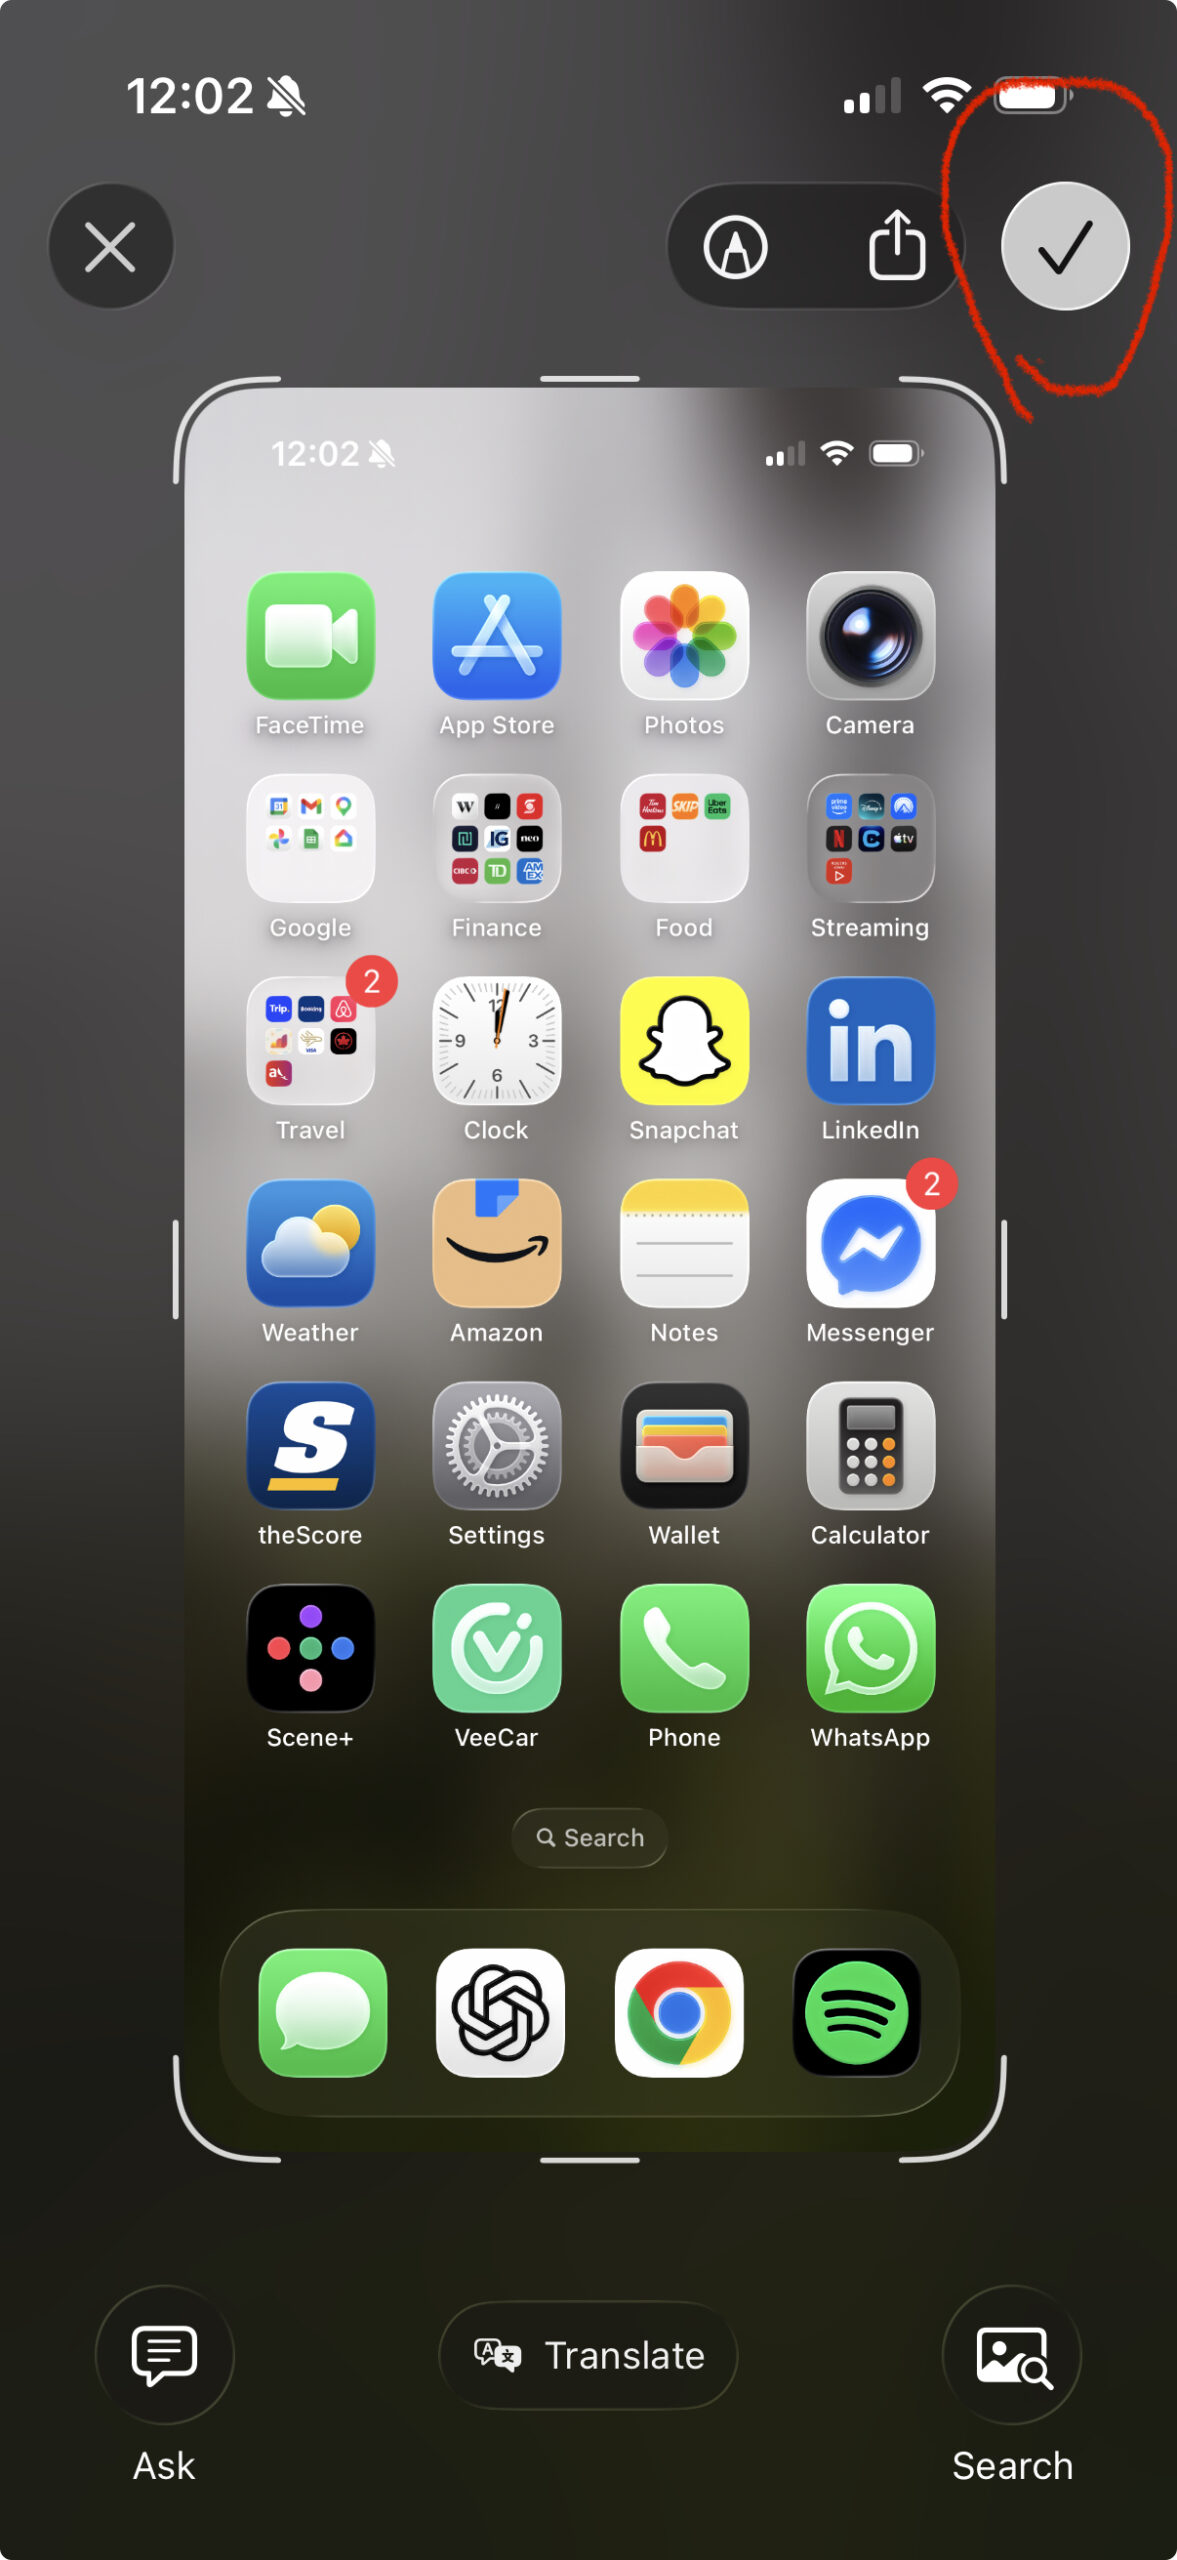
A preview of your screenshot will appear on your screen for a few seconds. In this menu you'll have the option to crop the photo if you'd like by simply dragging the corners of the preview inward to trim off anything you don't want included, then tap the red checkmark icon (circled above in red), tap Done, and choose Save to Photos to lock it in. If you'd rather share it right away with someone, tap the share icon immediately to the left of the checkmark, select messages, and type in the contact you'd like to share it with.
Also important to note, if you take the screenshot and don't tap anything at all, your iPhone screen will eventually time out and lock, the photo should still be automatically be saved and stored in your Photos app.
For Older iPhones (With a Home Button)
If your iPhone has a round Home Button below the screen, the button combination is slightly different for capturing a screenshot, but just as easy.
Step 1: Find the Side or Top Button). On most Home-button iPhone models, this is on the right edge. On some very older models, it's on the top edge instead.
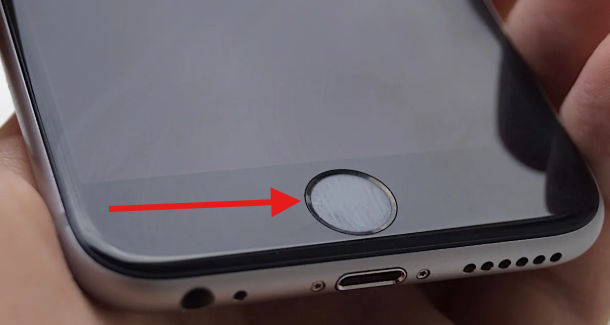
Step 2: Find the Home Button. This is the round button below your iPhone's screen.
Step 3: Press both of these buttons simultaneously and then release. A preview of your screenshot will appear on your screen for a few seconds. In this menu you'll have the option to crop the photo if you'd like by simply dragging the corners of the preview inward to trim off anything you don't want included, then the checkmark in the top right corner, tap Done, and choose Save to Photos to lock it in. If you'd rather share it right away with someone, tap the share icon immediately to the left of the checkmark, select Messages, and type in the contact you'd like to share it with.
Again, if you take the screenshot and don't tap anything at all and your iPhone screen eventually times out and locks, the photo should automatically be saved and stored in your Photos app.
Where Your Screenshot Is Saved
Screenshots are automatically saved in the Photos app as mentioned earlier, so there's nothing difficult you need to do to find them.

Step 1: Open Photos. It's the flower-shaped icon on your home screen.
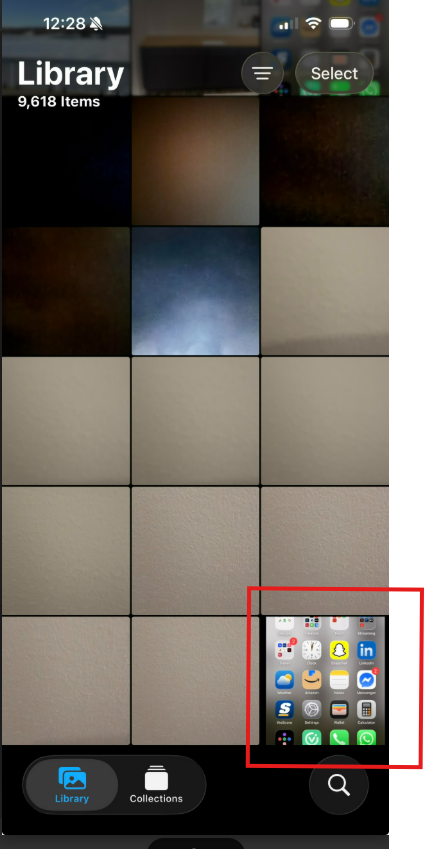
Step 2: Scroll to the bottom of your library. Your screenshot should be sitting right there as your most recent photo.
Quick Tip
If nothing happens when you press the buttons, don't panic. Try again, you likely didn't press them together at the exact same time and this is very common. For example, if you hit the side button slightly earlier, you'll end up simply locking your iPhone instead. Just unlock your iPhone and try again.
Go ahead and try it out for yourself. Take a screenshot of something for practice, even if it's just your home screen. Once you do it a couple of times you'll be a natural.
And if you want to check out Apple's own version of these steps as a backup reference, you can find it here:
Apple Support - Take a Screenshot on Your iPhone).
Bonus Tip: Viewing Only Your Screenshots in the Photo App
If your Photos app library is getting crowded, you don't have to scroll through everything to find a screenshot. Follow these steps to view only screenshots you've taken instead of your entire camera roll:
Step 1: Open Photos and tap the Collections Tab at the bottom of the screen.

Step 2: Scroll down and tap the Media Types section.
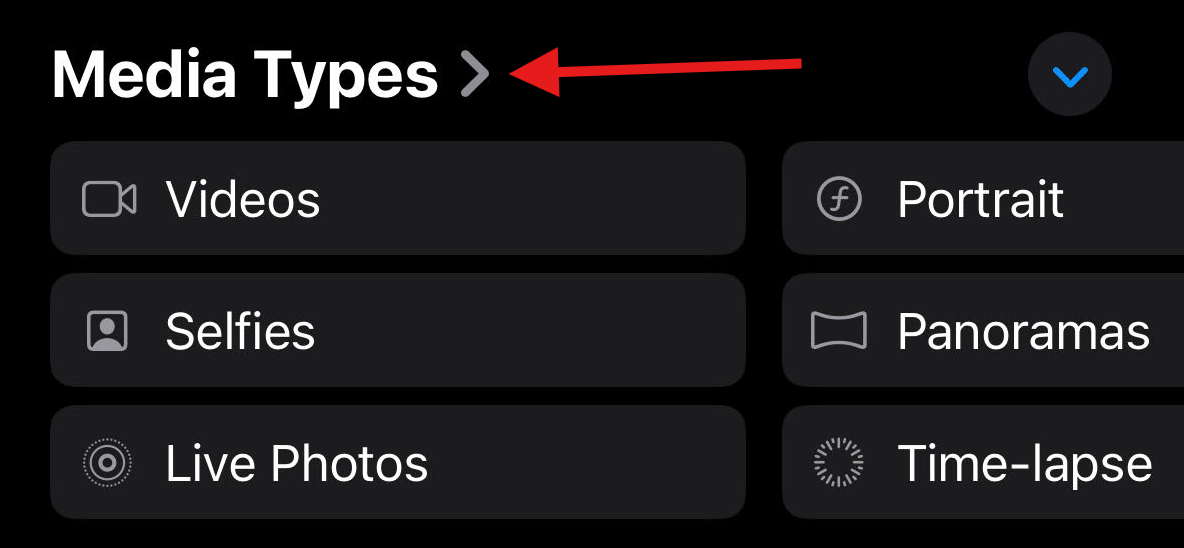
Step 3: Tap Screenshots from the menu list. This will then display all of your screenshots you took currently in your photos library, making it much easier to find the one you're searching for!
Got Another iPhone Question?
Screenshots are just one small piece of getting comfortable with your iPhone. If there's something else that's been tripping you up, drop it in the comments below, that might just be exactly what I write about next.
Until next time,
Your Online Tech Nephew.
FAQ
Do I need an app to take a screenshot on my iPhone?
No, screenshots are built right into every iPhone. You just need the right button combination and you're good to go.
Why Isn't my screenshot saving?
Almost always this means the two buttons weren't pressed at the exact same moment. Try again, pressing both buttons together rather than one after the other.
Where do my screenshots go?
Every screenshot you decide to keep is saved in your Photos app.
How do I delete a screenshot in the preview menu I don't want or took by accident?
This is one is simple, tap the X located in the top left corner of the preview menu instead of the checkmark in the top right corner. That closes it out without saving anything to your Photos app. If the photo made it to your Photos app and you want to delete it from there, simply open the photos app, tap the photo, then tap the trashcan icon in the bottom right corner.