
Taking a screenshot is a handy way to save what’s on your screen. Maybe this is a recipe, a funny text message you received, directions, or a photo of the grandkids.
Lots of folks either don’t know about this, or do, and get stuck trying to do it. Don’t worry, it’s very simple once you know the buttons. I’ll walk you through it step by step.
For newer iPhones (No Home Button. Most iPhones from 2018 and older).
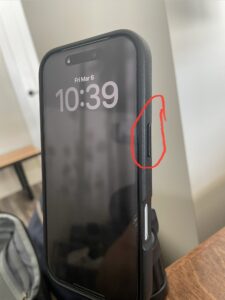
Find the Side Button on the right side edge of your phone (it’s the long button you use to lock the screen).
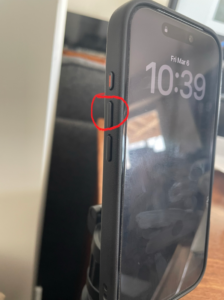
Find the Volume Up button on the left edge side (the top button of the two volume buttons).
Press both buttons at the exact same time.

Release them quickly.
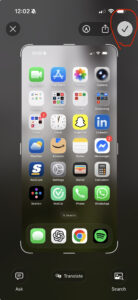
You’ll notice the screen flash white (like a quick camera snap), and you might hear a shutter sound (though it’s okay if you don’t, it likely just means your volume is on silent). A picture of your screenshot will now appear in the middle of your screen. Here, you can save the screenshot by tapping the checkmark (circled in red in the photo below) and pressing “Save to Photos”.
Where Your Screenshot Is Saved
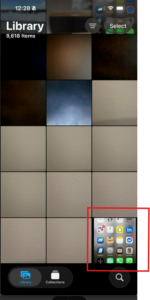
Screenshots are automatically saved in the Photos app.
![]()
Open Photos → scroll to the bottom, and it should be saved as your most recent photo in the library.
Quick Tip
If nothing happens when you press the buttons, don’t panic. Try again, it’s possible you didn’t press them together at the same time. For example, if you accidentally hit the button on the right edge side first, you’ll lock the screen and the screenshot won’t work. Just unlock your phone and try again!
You’ve got this. Try it out now for yourself, take a screenshot of something for practice, even if it’s just your homepage screen. Once you do it a couple of times, you’ll be a natural.
Still stuck? Leave a comment below, your digital tech-savvy nephew is here to help!